Contributing
This page covers the technical side of contributing to the wiki: getting the repo, making changes, and getting them merged.
Prerequisites
Tip
Basic familiarity with git is required: If you are new to these tools, visit git for complete beginners for a comprehensive introduction to them.
- Programs
gitandpythoninstalled locally. - An account on our Forgejo instance with access to the wiki repository.
- (Optional but recommended) a Markdown-aware editor with a live preview.
The Workflow
Considering the small size of our team, we function with a clone, branch, commit and merge workflow:
- Clone: get a local copy of the latest commit of this wiki.
- Branch: branch our local copy and implement our changes.
- Work: make your respective in-scope changes.
- Commit: create a snapshot containing all of your changes.
- Merge: submit your snapshot for review, pending approval from the team.
Note
Branches, commit messages and pull/merge requests (steps 2, 4 and 5) follow the Conventional Commits naming convention to be as semantic as possible, and facilitate CI/CD pipelines.
1. Clone the Repository
First, clone the repository by using git in a terminal of your choice:
git clone https://git.compassconsulting.cl/compass/wiki.git
# then enter the repository directory
cd wiki
git clone ssh://git@git.compassconsulting.cl/compass/wiki.git
# then enter the repository directory
cd wiki
2. Create a Branch
Create a branch named after what you're doing:
git switch -c <name of branch>
Branch naming
Prefix the branch with the same type you'll use in your commit; like docs/, fix/, feat/, followed by a short, hyphenated description.
Do note that the branch name should be directly related to the scope of your work (e.g.: Work for this document was made under the docs/getting-started branch, because I also reworked the entire "Getting Started" section).
Any changes that are outside said scope should be separated accordingly, or made under a more general branch.
3. Make your Changes
Create or edit the relevant files with an editor of your choice, and set a local development server to preview your changes locally.
Ensure you're in the project folder
You must be in the project directory (wiki/) for the following steps to work correctly.
Dependencies
We can install all of our dependencies without breaking system compatibility by using a Python Virtual Environment (venv):
python -m venv .venv                # we install the virtual environment
source .venv/bin/activate           # we activate it
pip install -r requirements.txt     # we install all prerequisites to run MkDocs
Development Server
With all of our dependencies installed, we can now run mkdocs locally to showcase our changes as we make them:
mkdocs serve --livepreview
This will start the development server at localhost:8000, and will self-reload when you save any changes. You can close the development server by pressing Ctrl+C
4. Commit your Changes
We use Conventional Commits for commit messages. The format is:
<type>(optional scope): <short summary>
Everything included in the commit should be lowercase with no period at the end. The scope is optional, but it should be the same as your branch name (e.g.: The branch docs/getting-started would have getting-started for scope). For our purposes, you can stick to a small set of types more relevant to the wiki:
| Type | Use it for |
|---|---|
docs |
Creating or editing documentation pages. |
fix |
Correcting an error in an existing page. |
feat |
Adding a new section or capability to the wiki itself. |
chore |
Maintenance that isn't content; config, CI, dependencies. |
git add <file(s) you worked on>
git commit -m "<type>: <descriptive message detailing your work>"
Naming matters more than the list of types
Don't worry about memorizing every possible type. If you're ever unsure whether something more specific applies check the full specification.
5. Push your Branch
Upload the commit(s) you have made to the upstream repository, so the team can be made aware of your changes.
git push -u origin <branch you created>
6. Open a Pull Request (PR)
In Forgejo, open a pull request from your branch into main. Give the PR a title that follows the same convention as your commit, and briefly describe what changed and why in the description.
Tip
If you are opening a fix: type, make sure to reference any issues linked to your PR using GitHub's keywords, either via comments or commit messages.
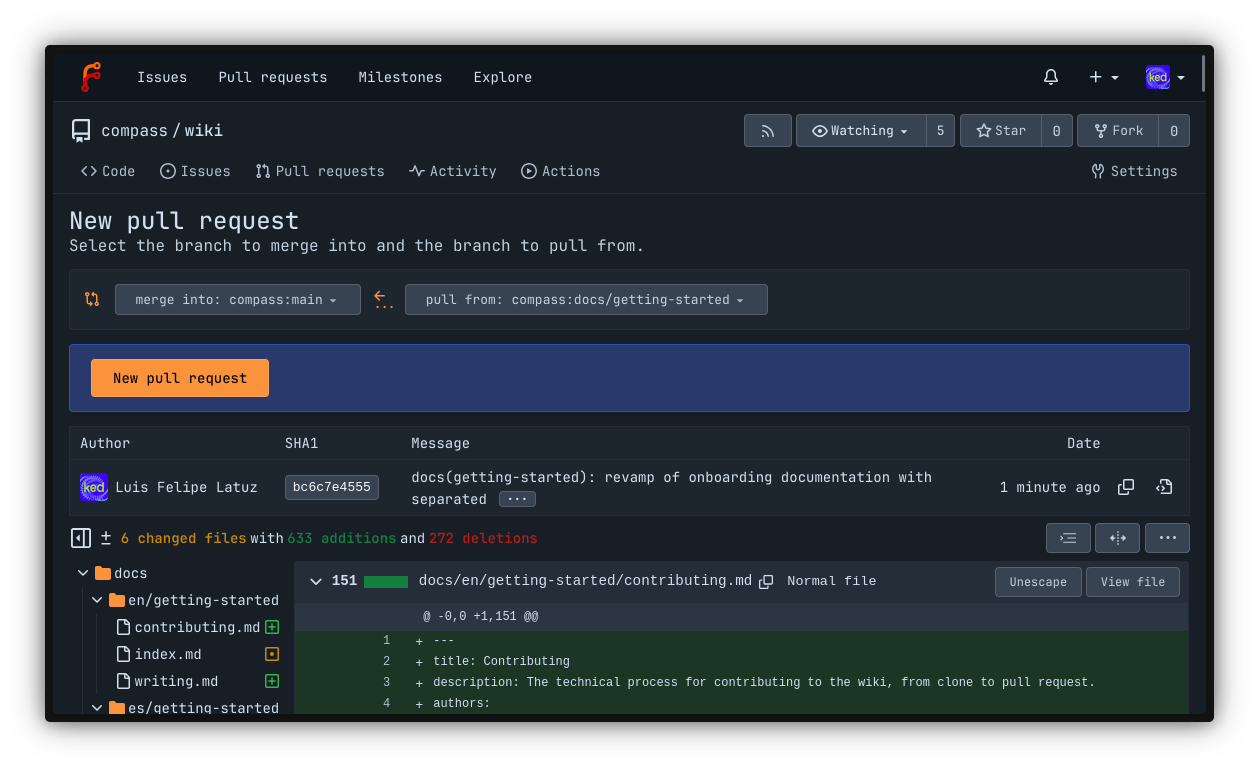
Once opened, another member of the team will review your work and may request changes to your code or documentation before merging them to the main branch. Once your changes are approved, your PR will be merged and implemented in the next iteration of the wiki.
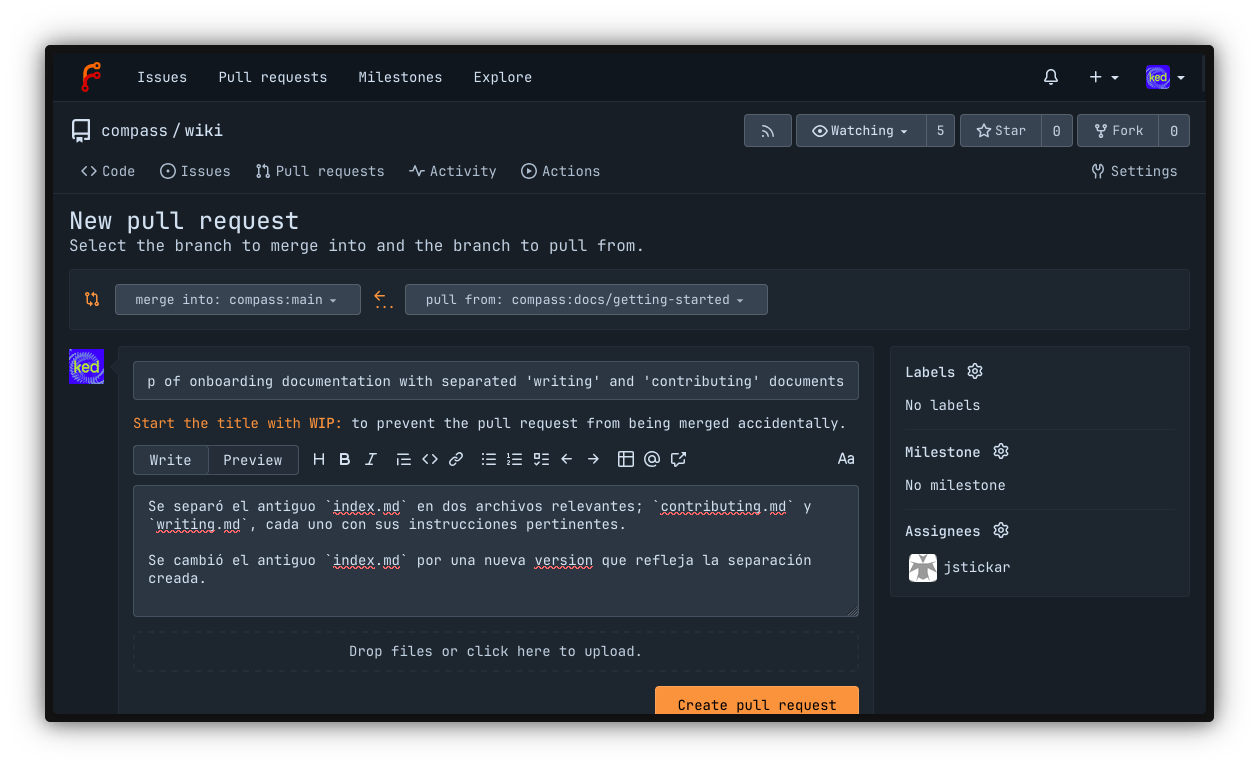
In case they find issues with your changes later on, the PR commits might be reverted and additional discussion will take place in the PR thread or a separate issue.
After Merging
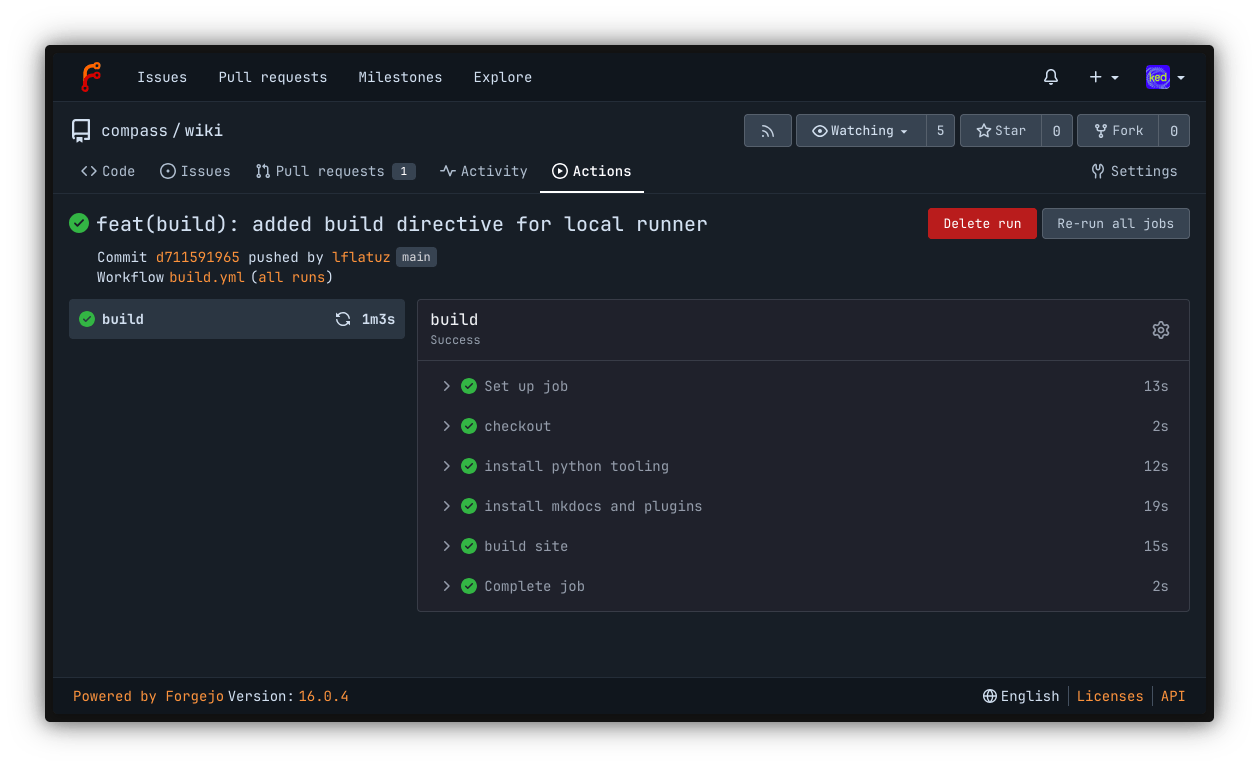
Once your pull request is merged into main, the build pipeline picks it up automatically and publishes the updated wiki, with no manual steps needed on your end.